I've been working on a few small projects around my house to distract myself from the HUGE kitchen renovation I've been working on all summer. Since my kitchen renovation is somewhat exhausting (completely repainting all cabinets, walls, installing new flooring, etc.) I have done a few smaller projects to make myself feel as though I am actually accomplishing something. About two weeks ago I was at a local antique shop and I found this great vintage light fixture for my kitchen (which currently has a crusty old 1980s ceiling fan):
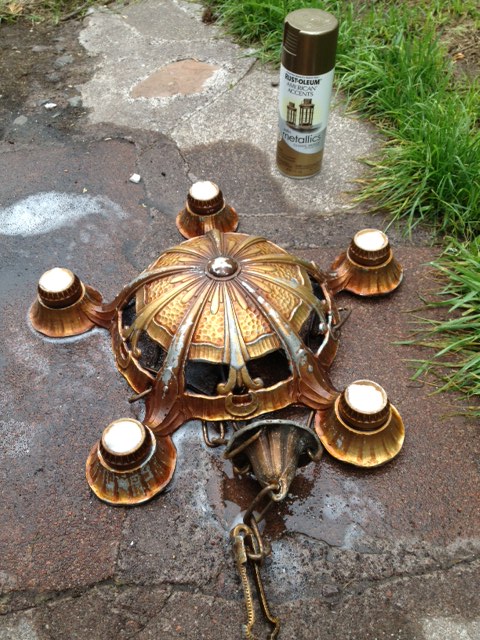
As you can see, the original painted finish is pretty worn and has flaked off badly in some places. I agonized over whether I should try to recreate the original paint (some red tones, some gold) or spray paint it a uniform gold color. I ended up spray painting it a metallic Rustoleum gold:

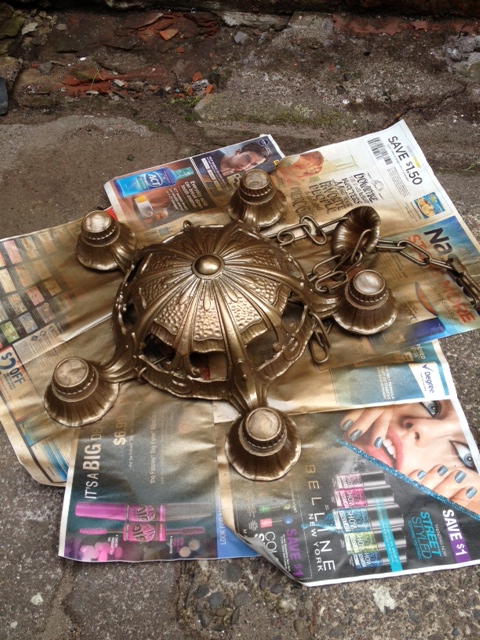
Even the Maybelline model is surprised at how good it looks! I stuffed a few cotton balls into each chandelier socket so that I wouldn't gum them up with paint. Overall I am pleased with it. I know it's not authentic but for $35 dollars I think it's a pretty nice, period fixture. This will hang in my kitchen once I am finished with the remodel. I am going to use the vintage "edison" type light bulbs since this fixture is designed to hang from the ceiling with the bulbs exposed. I will have a big ole post about my cheapie kitchen reno when I am done.
Next up: the kitchen floors. The flooring in my kitchen is a 1960s-era marbled-paint-effect linoleum. I have been planning on installing a paper bag floor in the space but I wanted to do a test run before I attempted the whole floor. I have a small coat closet in my kitchen entry way that I thought would be a perfect test surface since the previous owners of my home, kindly linoleum-ed it too (so thoughful!). So I applied a layer of brown paper soaked in Elmers to get started:
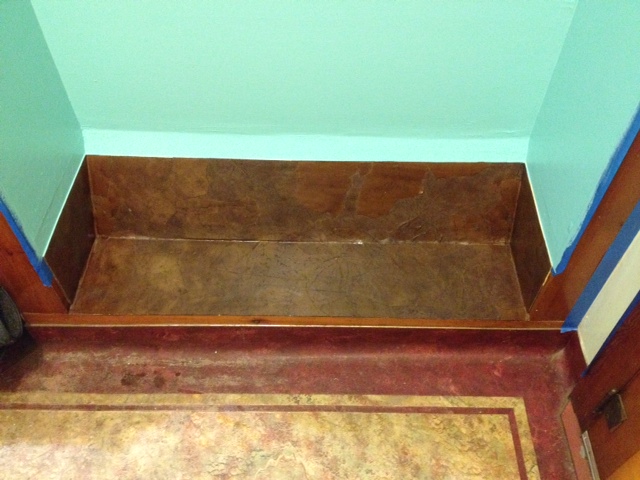
Next up: the kitchen floors. The flooring in my kitchen is a 1960s-era marbled-paint-effect linoleum. I have been planning on installing a paper bag floor in the space but I wanted to do a test run before I attempted the whole floor. I have a small coat closet in my kitchen entry way that I thought would be a perfect test surface since the previous owners of my home, kindly linoleum-ed it too (so thoughful!). So I applied a layer of brown paper soaked in Elmers to get started:
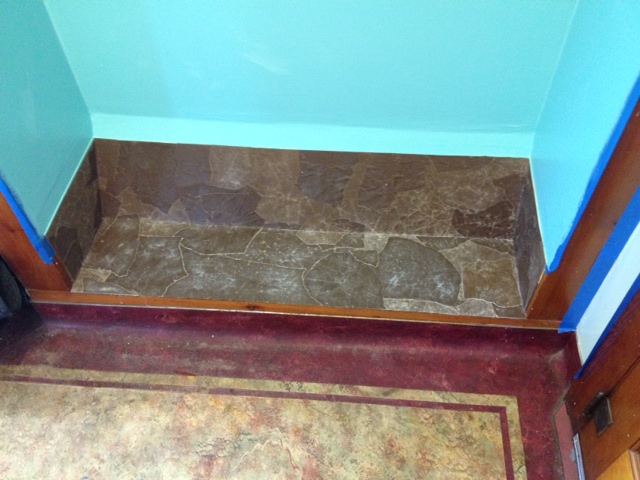
Look at that red and beige linoleum! It's a sight to behold! The surface of the linoleum is completely gone so it always feels like it's dirty since...it probably is. After 40+ years of wear and tear it feels like dirt and grit it just caked on the surface. No amount of mopping gets rid of it. I can't wait to install the paperbags over the whole thing! So, here you can see the paperbags still drying (the white-ish sheen is the Elmers). In the next picture you can see the paperbags after I applied a coat of English Chestnut Minwax Stain:
I haven't applied the polyurethane yet since the bf and I have to special order it. Anyway, these are just teaser images...stay tuned for the complete sub-$500 kitchen renovation post!
 RSS Feed